
Technical Info

So many components are changed with the electric start engine that it
is easier to replace the entire engine than to modifiy an existing one.
The only parts that are reused are the carb, exhaust system, clutch and
prop brake.
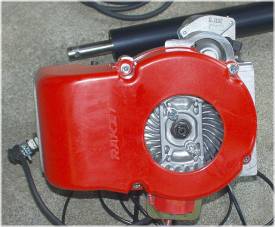
The pull start mechanism is done away with and a different crankcase is
required. The increase in weight of the electric start engine over
the pull-start is only one pound (1/2 kg).
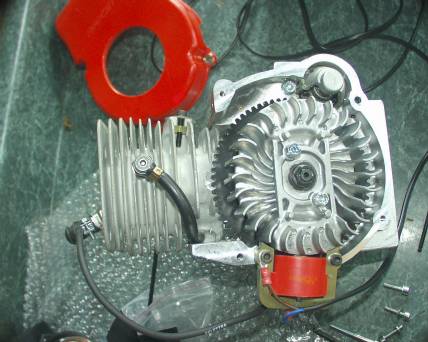
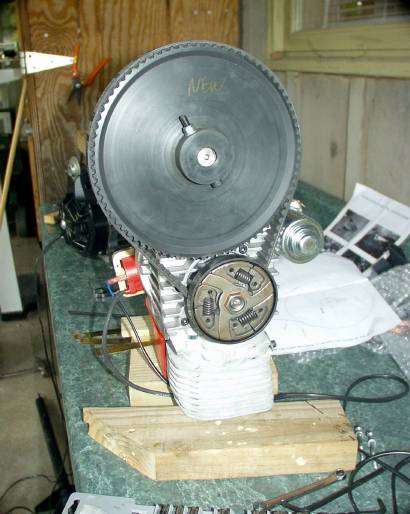
The above photo shows the flywheel cover removed. The starter is
seen on the top right. It engages with the toothed plate behind the
flywheel.
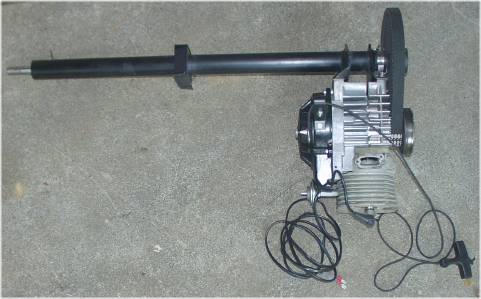
A new prop shaft is required because the engine must be relocated slightly
sideways.
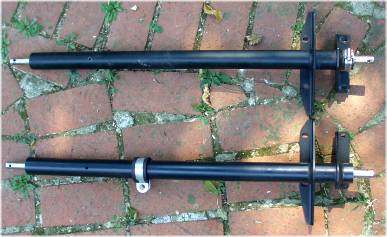
The manual-start prop shaft is at the top and the electric start shaft
below it. The difference is in the location of the bolt holes on
the engine mounting flanges towards the right end of the shafts, where
the e-start engine is shifted to the left relative to the harness (upwards
in the photo). One of the reasons I was able to justify spending
the money for the conversion is that there was a crack in the prop shaft
housing on the drive belt end. The replacement cost of the shaft
assembly alone was nearly one third the cost of the conversion kit, which
meant there would never be a cheaper time for me to buy the estart kit.
The crack was temporarily held together with a hose clamp - which can be
seen in the photo - while waiting for the kit to arrive. This did
allow me to get a few more flights, but even with the clamp as tight as
I could get it the crack continued to grow - use this 'fix' at your own
risk, with the understanding that it is purely temporary and could fail
at any time.
The engine is bolted directly to the prop shaft assembly, which is in
turn mounted to the harness frame with rubber mounts.
Because the carb is reused it was not necessary to detach the throttle
or choke cables or the fuel line, greatly simplifying reassembly.
The carb was simply unbolted from the engine and left attached to the harness.
The exhaust system and prop brake were also removed, leaving only the 3
rubber mount attachment points.
Once those 3 mounts were undone the engine/prop shaft assembly was easily
removed.
It now becomes very easy to do the actual engine switch at a comfortable
work bench rather than bending down working on the harness frame.
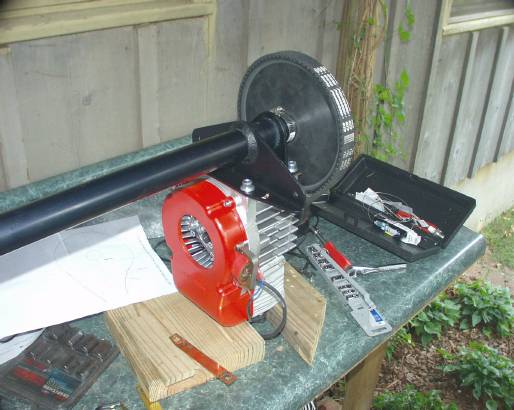
This is convenient because some time must be spend properly aligning the
engine with the drive pulley so that the belt tracks properly.
The shaft housing has slotted bolt holes to allow movement of the engine,
and shims are used to set the belt tension. See Clutch
Disassembly for details of removing the clutch from the old engine
and installing it on the new one.
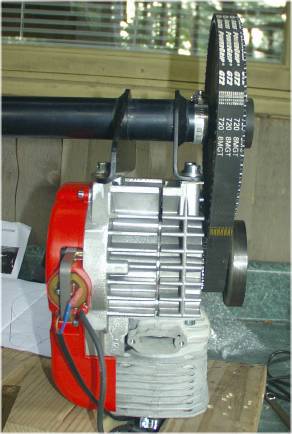
Once the alignment has been carefully carried out (be sure the belt is
tracking properly and not rubbing against the side of the engine pulley),
and the tension is properly set, reinstalling the assembly in the harness
requires only re-attaching the 3 rubber mount points.
Attach the exhaust system, prop brake and carb. Because the control
cables were not disconnected everything should still be properly adjusted.
One part I found missing from the kit was a plug to close up a port in
the carb spacer block. The compression release has been modified
so that this connection to the carb base is no longer required. A
quick trip to the harware store yielded the plug necessary to close this
hole.
Now you are almost done. If you had the foresight to charge the battery while doing the mechanical work, you may be tempted, as I was, to temporarily connect the wiring and try out the starter! A few easy cranks of the engine provided all the incentive I needed to finish the job.
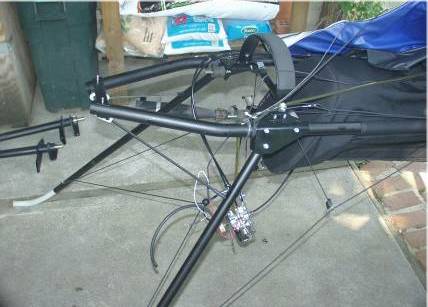
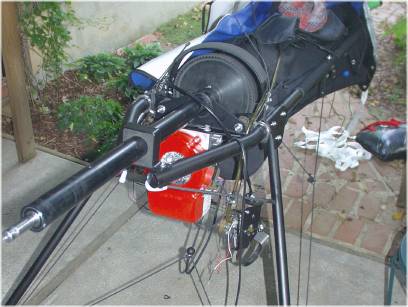
The battery pack and starter switch are located over the pilot's back.
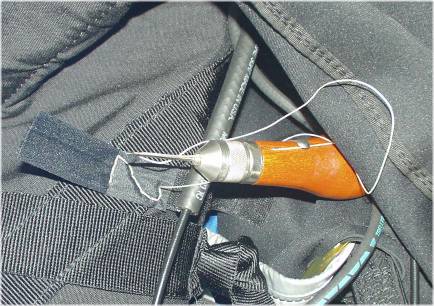
A rubber tube from the pressure (starter) switch is located at the pilot's
left shoulder, next to the mouth throttle. Blowing into the tube
activates the starter, and is a clever system to prevent accidental activation
of the starter. The starter wires must be routed from the engine
to the battery location, and some tabs attached to the harness to hold
the battery and starter switch.
This sewing was accomplished with the humorously mis-name "Speedy Stitcher"
Sewing Awl. It may not be speedy, but it does get the job done.

This shows the completed installation. The battery is held in place by two velcro loops and a plug is used to connect and dis-connect it from the harness wiring. The plug and pressure switch are protected within a velcroed pocket (shown open in the photo above). It is a simple matter to remove and replace the battery. The instructions recommend keeping the battery separate from the harness at all times except when flying with it (to have it available for charging and so that an accidental short does not cause damage).
The battery pack weighs less than 2 lbs (1 kg), so the total weight penalty for the electric start conversion is slighty under 3 lbs (1.5 kg).
Attach grin and go flying! The main drawback I see to this is that now you have to break in a new engine all over again!